Welcome


These are tried, tested and much loved recipes. Our families and friends are always unselfish and devote themselves to taste-testing these delicious creations and demand them repeatedly time and time again.

Our aim is to share with you our favourite meals and the little tricks and tips we have learnt along the way.
Time is precious.
Food is expensive.

Both are resources too valuable to waste.

We want to share recipes that deliver delicious, nourishing meals - making the most of your time and ingredients.

Life is way too short for bland, disappointing food.
So ... Feed your inner cook - and Enjoy!

Wednesday 29 August 2018

Lemon Ricotta Cake Biscuits

Usually when I make a cake or biscuits I have one small slice and that is enough for me - the rest disappears between family, friends,work and neighbours. But I found these biscuits tooo  delicious - so tempting and lemony! Yum!  
This Giada De Laurentiis recipe  describes them as biscuits that are like little cakes on the inside - and they are just a bit different - soft inside, a little crunchy and sweet/tart with the firm lemon glaze, which is a must for this recipe.

I have little frozen icecubes of lemon juice on standby but sometimes don't have a fresh lemon for a hit of lemon zest or the zest lacks zing.  I found (and personally paid for) an amazing fruit product at Regional Flavours in Brisbane from GinGin and Dry  GinGin and Dry FaceBook - foil packed, dried powder lemon zest (photo at end of post).  I think it is such a wonderful standby in the pantry - I have added the tiniest pinch when baking, cooking salmon, sauces - so versatile and the flavour/aroma hit is sublime.  I love supporting products from local towns - click on the names for the links for more information.  Excellent stuff. Plus their lime zest is a knockout too.   Enjoy!  Colleen


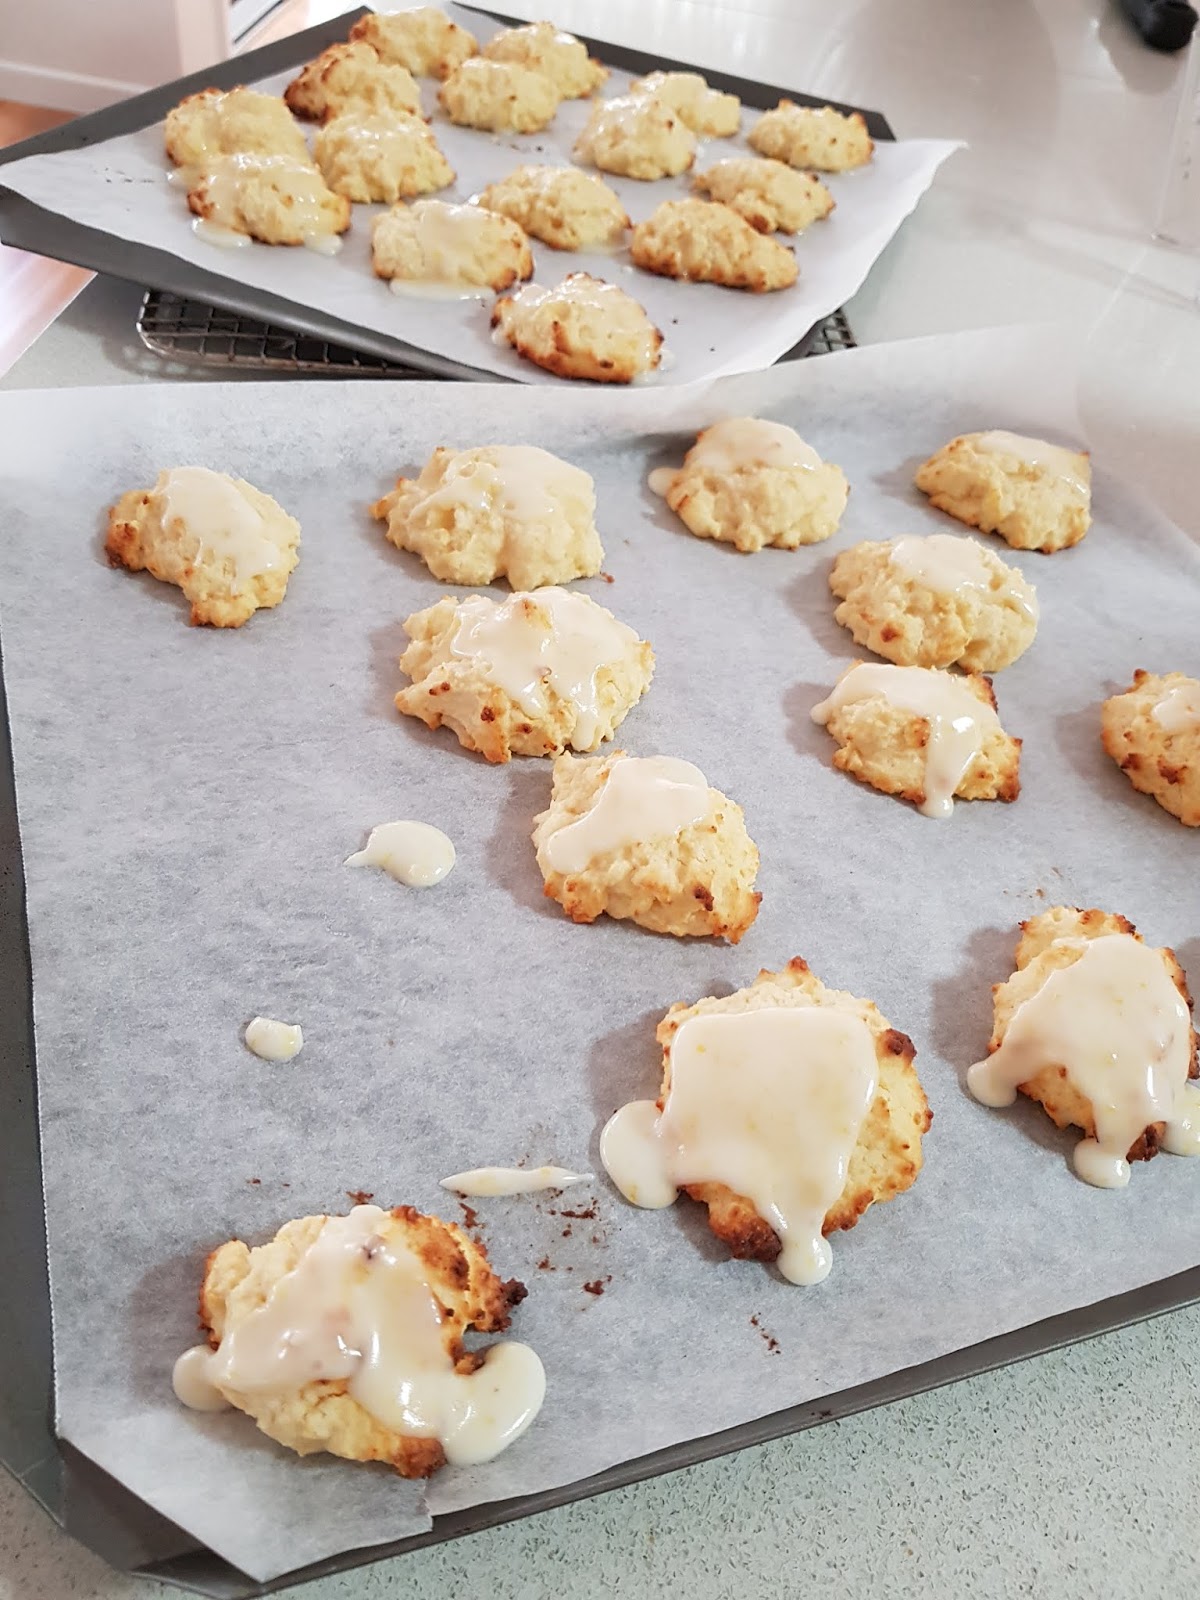
Lemon Ricotta biscuits. Feed Your Inner Cook
  I halved original recipe amounts, so this makes 2 biscuit trays of approx 24 - 28 biscuits

Ingredients
1 1/4 cups Plain Flour
1/2 teaspoon baking powder
1/2 teaspoon Salt flakes
65 gram butter at room temperature, soft but not melting
1 cup sugar
1 egg
210 -220 gram Ricotta.  I used fresh ricotta from a Deli. Drained. Break up into small bits before adding. But the supermarket tub ricotta should be okay I think
Zest of 1 lemon
2 tablespoons of fresh lemon juice

Glaze
1 cup icing sugar - sifted
Zest of 1 lemon
Fresh lemon juice (approx 1 -2 tablespoons) Add a bit at a time.

Method
Prepare 2 flat biscuit trays and preheat oven to 180 - 190 oC.

In a medium bowl, sift combined flour, baking powder and salt.
Then, using an electric mixer: beat the butter and sugar until light and fluffy.
Add the egg and whisk until combined
Add ricotta, lemon zest and lemon juice and beat to combine.
Stir in the dry ingredients.

Use a 2 teaspoon method to spoon small amounts onto prepared baking trays.
Bake approx 12 -15 minutes until golden around the edges.
Remove from oven.  Leave to cool on the trays approx 15 minutes.

Making the Glaze
With the sifted icing sugar in a small bowl and slowly add the lemon juice and the zest whisking firmly (a fork or small whisk is good) until the icing forms a runny but thick paste. You want it to coat the biscuits, not soak in.  (I did a few with runny icing - tasted okay but the thicker icing was better).
Leave until the glaze hardens - good luck with that!
Store the cooled biscuits in an airtight container.
GinGin & Dry Products from Queensland Australia
Enjoy with a cup of tea - ssooooo yummy!  Thank you Giada!   Enjoy! Colleen


Wednesday 22 August 2018

Vegetarian Boston Baked Beans

These beans are a tasty start to your day when looking for an alternate to eggs.  They freeze really well so pop a few small containers of these in your freezer.  Best with some quality sourdough toast.


Ingredients

2 x 400g tin of butter beans
Olive Oil
2 onions peeled and diced
3 carrots, diced
2-3 celery diced
4-6 garlic cloves, crushed
2 x 400g tin tomatoes (blitzed with stick blender to make puree)
3 teaspoons smoked paprika
2 tablespoons of mustard powder mixed with a little water
1/4 cup brown sugar
1/4 cup molasses
1/4 cup red wine vinegar
1 bay leaf
1 sprig thyme

Method

Preheat oven to 140 degrees Celsius.
Drain and rinse butter beans
In a large oven proof pot, heat oil.
Fry onion, carrot and celery until soft, add crushed garlic at the end to avoid burning.
Add paprika and stir to combine.
Add tin tomato, mustard, sugar molasses, bay and thyme.
Add sufficient water to make a stew.
Pop lid on and bake in oven for 1 - 11/2 hours, checking to ensure sufficient liquid, add more water if too thick.
Add vinegar and salt and pepper to taste.
Cook for a further 1/2 hour, taste if too sweet add more vinegar.  If too liquid remove lid.

Delicious anytime of day.

Mamma Marmalade


Thursday 16 August 2018

Hasselback Pumpkin

I love my veggies and am always keen to find different ways to serve veggies at family gatherings.  This is a great prep ahead dish and tasty change from traditional chunks of roasted pumpkin.  Veggies will now become the centrepiece of your meal or celebration!
Enjoy!  Colleen

Hasselback Pumpkin by Feed Your Inner Cook 


Preparation   15 minutes
Cooking         45 - 60 minutes depending on pumpkin size.

You need to use 2 old wooden chopsticks when slicing the pumpkin
Ingredients
1 butternut pumpkin cut in half lengthways  (you could do more if you like)
1 1/2 tablespoons butter - melted
1/2 tablespoon olive oil

Options -  Depending on what you are serving the pumpkin with:

Mix the melted butter /oil with
1/4 cup brown sugar  
1 tablespoon golden syrup
1 teaspoon dried thyme leaves
fresh thyme leaves from 6 - 8 sprigs plus extra 8 -10 sprigs to garnish at end
1 teaspoon smoked paprika
1 teaspoon sea salt flakes
option - 2 crushed garlic cloves
and optional - some toasted chopped pecan chunks for final garnish

OR   Mix the melted butter /oil with
1/4 cup maple syrup
2 tablespoons brown sugar
1/2 teaspoon ground nutmeg
1 tablespoon grain mustard
fresh sage leaves - good handful - push some inbetween pumpkin and some for on top
option - some toasted chopped walnut chunks for final garnish

OR  other options could include toasted pinenuts, rosemary leaves, parsley etc

Method

Preheat oven to 200 oC and line baking tray with baking paper.
Peel and de-seed the pumpkin halves.
Put the pumpkin cut side down.  The curve faces up.
Place a chopstick on either side of the pumpkin.  Using a very sharp knife slice very fine slices through the pumpkin - the chopsticks prevent you cutting to the bottom and help hold the shape.
Carefully place onto the prepared tray.
Combine your topping mixture by adding the sugar/maple syrup with the melted butter/oil then add the herbs, spices etc you have decided to add.
Brush the pumpkin halves with most of the topping.  Reserve some so you can baste them a couple of times during the cook.
Baste during the cook.
Bake approx 40 - 60 mins. Test that the thickest middle pieces of pumpkin are tender.
Sprinkle with desired toasted nuts, extra herb sprigs etc.
Hasselback Pumpkin by Feed Your Inner Cook
            Enjoy!  Colleen

Thursday 9 August 2018

Nana's Sunshine Teacake with Crunchy Topping

This much loved recipe has been in our family for over 50 years. I can remember helping my Nana bake this cake in her tiny kitchen many many times over the years. Although I doubt I was actually any help - more of a hindrance I suspect - but she let me kneel on a chair next to her and 'help'.   Isn't strange that I remember her kitchen seemed so big - she could conjure up a meal for 12 in that llittle kitchen - which I now realise would have been smaller than most bathrooms are these days.  Quite humbling when I reflect on her household day.
So, thank you Nana - remembering her with love 💜 Enjoy!  Colleen

Sunshine Teacake by Feed Your Inner Cook
Preparation:   10 minutesCooking         30 - 35 minutes


Ingredients

In memory of Nana I am including the original recipe ounce weights as well as metric

2 ounces  (60 grams)  Milk Powder - she always used "Sunshine", hence the cake name!
6 ounces (170 grams) Self Raising Flour  
1 teaspoon ground Cinnamon powder
1/2 teaspoon each of ground nutmeg and ground cloves
4 ounces (113 gram)  OR   1/3 cup white sugar
3/4 cup warm water (not hot)
2 ounces (60 gram)  OR   3 tablespoons  OR   1/4 cup Butter - melted
1 egg - beaten
Topping
1 heaped tablespoon (30 gram) butter - softened NOT melted
2 tablespoons Brown Sugar
1/4 teaspoon each of ground cinnamon, ground nutmeg and ground cloves
1 heaped cup cereal flakes ie Corn Flakes or Special K - lightly crushed with your fingertips - you don't want crumbs but texture.

Method
Preheat oven to 175 - 180 ०C  and line an 8 inch round cake pan

Prepare Topping
Combine the sugar, spices and cornflakes gently with a fork or your fingers.
Rub the softened butter lightly into the flake mix until lightly coated.  Do not overmix.
Leave to one side as this is topping for the cake batter later.

Cake
In a mixing bowl,  sift together the milk powder, Self raising flour and spices.
Stir the sugar through the mix.
Stir the combined warm water and melted butter into the cake along with the beaten egg.
Mix until combined.
Pour the batter into the prepared cake tin.
Sprinkle the flake topping on top of the batter and very gently press into the top of the batter.  Don't press too hard, you just want it to sit and form a nice crust.

Bake in oven for 30 - 35 minutes.  Check with a skewer that middle of cake is cooked.
Allow to sit in pan 5 minutes to cool a little.
Remove from pan and  if desired, serve warm with a nice cup of tea.  
                               Enjoy!  Colleen (and Nana)


Thursday 2 August 2018

Pea and Ham Soup - Traditional and Delish

Winter is the perfect time for bowls of warm, nourishing soup at any time of the day.  This recipe makes a big pot of soup - I also freeze individual small portions for easy meals on busy days.  Although it takes a while to make, there is almost no effort - it is about soaking the peas and then letting the soup simmer away imparting it's heady, homecooked aromas into your kitchen.  Enjoy!   Colleen

Pea & Ham Soup by Feed Your Inner Cook
     
Ingredients

500 gram Green split Peas - (dried) these need to be soaked overnight as per instructions below

splash of Olive Oil
2 onions - chopped
2 cloves garlic chopped
500 gram bacon chopped into chunks  or use the precut bacon cubes
1 Ham Hock  (I use the bacon/hock combination as I think 2 ham hocks becomes too salty - up to you how you want to add the ham)
Water
handful red lentils
1 bay leaf.  Remember to discard later on
teaspoon peppercorns
teaspoon Caraway seeds  (optional)
teaspoon celery seeds (Optional)
3 large stalks celery - roughly sliced 
PLUS reserve a few of the soft inner green leaves for garnish later
3 carrots - roughly chopped
Few good stalks of flat leaf parsley - chopped
2 teaspoons dried mint
2 - 3 cups frozen green peas (allow to defrost)
1/2 bunch fresh mint - leaves roughly chopped
options:  splash Worchershire sauce, Ground Pepper, Salt

How to soak the peas
Rinse the peas and discard any little pebbles etc.  Very unlikely but good to check.
Use a very large bowl - tumble in the peas and cover generously with water.
Cover with a clean teatowel
Leave to soak overnight  or minimum 8 hours. Frothy scum is normal and will rinse away.
Drain and rinse well - may need to rinse several times.  Peas are now ready to cook.

Method
Heat a very large deep saucepan/pot on the stove and warm a splash of oil
Crisp the bacon pieces and remove for later.
Add the onions and stir to soften
Stir in the garlic
Carefully add at least 2 litres of water then add the drained soaked peas.  Bring to a boil then rapid simmer 30 minutes. I like to cook the peas well before adding the salty hock so they soften and cook .
After 30 minutes, add the ham hock, bay leaf, seeds, peppercorns, red lentils, celery and carrots and extra water (at least 1 litre - probably 2)
Slowly simmer the soup for 2  to 2 1/2 hours. Taste and check the peas are super tender and falling apart.
You may need to add a little more water if necessary.
Remove and discard the bay leaf.
Remove the ham hock and take skin off.  Roughly shred the meat from the bone.
Add dried mint and the shredded ham hock meat along with the cooked bacon pieces.
Stir in the defrosted green baby peas and the parsley.
Simmer a little more. Then taste. 
Add to your taste (options) - more ground pepper, a splash of Worchershire Sauce, a little salt.
Add in the roughly chopped fresh mint and reserved celery inner green leaves just as you turn off the heat.
Remove some of the meat pieces and vege pieces before blending if you want the soup to have a chunkier consistency.
I use a handheld immersion stick blender and puree most of the soup - keeping it in the pot in the sink.  That is why I use such a deep pot (and an apron!)  if you keep the head of the blender under the soup it shouldn't splash.  Turn it off before removing it from the soup.
Taste again - adjust if needed.  Add hot water from the kettle if too thick. Add any reserved meat, vegetable chunks back to the soup.

Serve into warmed bowls, or hollowed out bread rolls.
Garnish with mint leaves or bacon pieces  or dollop or sour cream or fried chorizo for a change. A tiny squeeze of lemon juice is a zingy option too.

To Freeze
Allow the soup to cool. Package into freezer safe containers (and label) - portion sizes make for simpler defrosting later.  I freeze my soups when they are quite thick and add water later as takes up less room in the freezer.
To use later:  defrost preferably in the fridge overnight  - use an extra tray to avoid leaks .
then use a saucepan to gently reheat the soup. (although I have sometimes reheated from mostly frozen).  Refresh the flavour with fresh mint garnish or a squeeze of lemon juice.
                                 Enjoy!   Colleen